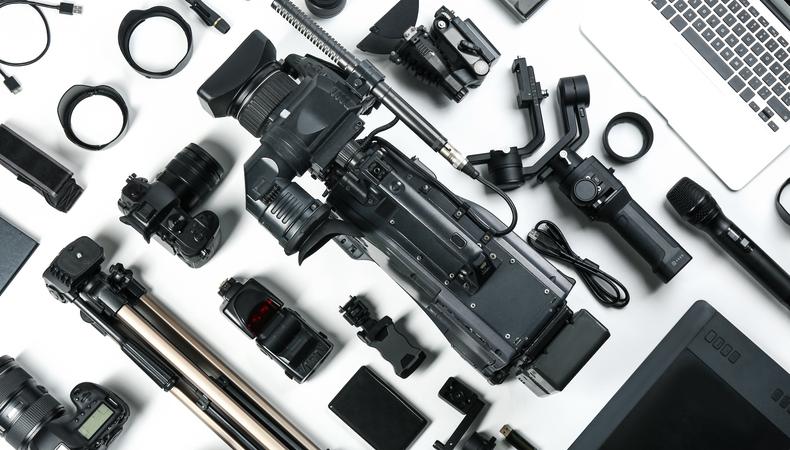
Splurging on the latest and greatest content creator equipment can be mighty irresistible at the start of your journey. We love the tech, we want the gadgets, and it’s easy to while away hours (that could be spent actually creating) comparing cameras and reading up on mics. But assembling the basics needn’t be such a chore – or even that expensive.
Let’s break down the essentials to identify the equipment you actually need.
1. Smartphone
One of the first questions aspiring content creators ask themselves – and others – is whether their smartphone can handle most of the filming.
Yes, smartphones are ideal equipment for beginners. Flagship models can produce professional-level video and images, and brands interested in buying user-generated content (UGC) often prefer the authenticity that comes with shooting on a smartphone anyway.
They’re also versatile – you can shoot, edit, and upload from a single device – budget-friendly, and literally made to be portable.
Make the most of your smartphone by:
- Using the rear camera for better resolution
- Shooting in 4K at 24/30 frames per second
- Filming in brightly lit places without pointing the camera directly at your source of light
- Combining with a tripod and external microphone (we’ve covered both below)
2. Camera
“If you're just getting into making YouTube videos, your smartphone camera is probably the best, most cost-effective place to start,” Adriana Wiszniewska writes for product ratings site Rtings.com. “That said, there are some things a smartphone can’t do.”
If you’re serious about becoming an influencer, making the jump to a dedicated camera is something to consider once things start picking up. They bring bonuses like:
- Interchangeable lenses for improved versatility and low-light performance
- Larger sensors and higher bit rates to improve image quality
- Superior control over settings such as shutter speed and aperture
- Greater range of recording formats
Mirrorless cameras hit the spot for emerging creators. More lightweight and compact than a DSLR, they pair well with different lenses, boast high frame rates excellent for burst shooting, and offer rapid autofocus. Find one with a tilting and fully articulated screen so you can view yourself while filming.
3. Tripod or stabiliser
Even the finest camera or smartphone will capture shaky, amateurish footage when not properly held, and that’s going to instantly alienate any brands or clients hoping to connect with a professional content creator.
Tripods and stabilisers correct that issue in different capacities.
- Tripod: These provide maximum stability and minute adjustments necessary for any content in which the camera remains still, such as long-exposure photography, streaming, or long-form video.
- Stabiliser: Gimbal stabilisers capture smooth, unblurred footage even while the camera is moving, making them a go-to for vlogging or any other situation in which the camera is in motion.
Both are relatively budget-friendly (stabilisers can get pricey, but you don’t need a high-end model) and user-friendly. Regularly overlooked by newcomers, this is beginner content creator equipment that can make a surprisingly noticeable difference.
4. Lighting
Newbies can use a single ring light to create a flattering brightness that minimises shadows. It works particularly well for makeup tutorials and other content focused on your face. “For the best results, place the ring light directly in front of you or slightly to the side at a 45-degree angle,” Cameron Wingate writes for studio lighting service Lencarta.
Or step up your game with a basic three-point setup:
- Key light: This is your main and brightest light source, set at a 45-degree angle to yourself. A ring light works well.
- Fill light: This has half the key light’s brightness, and should be set at the opposite 45-degree angle. Try a simple panel light.
- Back light: This has 25% to 50% of the key light’s brightness, and should be set directly behind yourself to create depth. Again, panel lights are ideal.
It’s not essential, but the added scope to experiment with your lighting brings the freedom to adapt around different types of content.
- For streaming, dimming the key light and backlight can prevent visual irritation during longer sessions.
- For long-form videos, three-point lighting creates dimension and depth to minimise viewer fatigue.
- For shorter vertical videos, high-contrast lighting grabs people’s attention while scrolling.
5. Microphone
“Audio is so often overlooked, but it’s the easiest way to instantly level up the quality of your videos,” says audio/visual guru Tom Buck.
Buck points out that reduced image quality with superior audio is generally more pleasing than strong image quality with subpar audio, making the choice of mic arguably more important than your camera.
Even a relatively inexpensive model offers:
- Sharper vocal clarity
- Reduced background noise
- Clearer, richer sound
- Less interference
USB microphones make sense for beginners. A plug-and-play, all-in-one recording option that plugs directly into PCs, laptops, tablets, and smartphones, they’re also highly portable and available in a range of prices.
Lavalier microphones (sometimes called “lav” or “lapel mics”) that clip discreetly to your clothing are a godsend if you’ll be moving around outside while keeping your hands free. You’ll notice popular streamer ExtraEmily wearing one throughout this livestream.
6. Pop filter and windscreen
Maybe you’ve noticed some content creators have circular mesh screens positioned a few inches from the microphone. These are pop filters, or pop shields, used to improve audio quality by filtering out harsh sounds while guarding the mic itself against moisture damage and saliva.
If you’re heading outside, pick up a windscreen, or wind muff, to prevent wind and other outside noise from ruining your audio. Here’s one being used for a quick street interview as someone absolutely murders a “name the flag” challenge.
7. Editing software
Capturing footage and audio is only half the battle – now to refine it into polished, professional content. That means using editing software to shape the story, adjust image quality, and add creative flair.
For shorts, a simple all-online editing platform is going to save time and effort. Truth be told, native editors on TikTok, YouTube, and Instagram may be all you need. Other options include:
For full-length videos, upgrade to downloadable stand-alone software. They take only a little more getting used to, but the added control, editing options, and overall quality are more than worth the investment. Try: